The Repository Pattern is one of the most popular patterns to create an enterprise level application. It restricts us to work directly with the data in the application and creates new layers for database operations, business logic and the application’s UI. If an application does not follow the Repository Pattern, it may have the following problems:
- Duplicate database operations codes
- Need of UI to unit test database operations and business logic
- Need of External dependencies to unit test business logic
- Difficult to implement database caching, etc.
Using the Repository Pattern has many advantages:
- Your business logic can be unit tested without data access logic;
- The database access code can be reused;
- Your database access code is centrally managed so easy to implement any database access policies, like caching;
- It’s easy to implement domain logics;
- Your domain entities or business entities are strongly typed with annotations; and more.
On the internet, there are millions of articles written around Repository Pattern, but in this one we’re going to focus on how to implement it in an ASP.NET MVC Application. So let’s get started!
Project Structure
Let us start with creating the Project structure for the application. We are going to create four projects:
- Core Project
- Infrastructure Project
- Test Project
- MVC Project
Each project has its own purpose. You can probably guess by the projects’ names what they’ll contain: Core and Infrastructure projects are Class Libraries, Web project is a MVC project, and Test project is a Unit Test project. Eventually, the projects in the solution explorer will look as shown in the image below:

As we progress in this post, we will learn in detail about the purpose of each project, however, to start we can summarize the main objective of each project as the following:

So far our understanding for different projects is clear. Now let us go ahead and implement each project one by one. During the implementations, we will explore the responsibilities of each project in detail.
Core Project
In the core project, we keep the entities and the repository interfaces or the database operation interfaces. The core project contains information about the domain entities and the database operations required on the domain entities. In an ideal scenario, the core project should not have any dependencies on external libraries. It must not have any business logic, database operation codes etc.
In short, the core project should contain:
- Domain entities
- Repository interfaces or database operations interfaces on domain entities
- Domain specific data annotations
The core project can NOT contain:
- Any external libraries for database operations
- Business logic
- Database operations code
While creating the domain entities, we also need to make a decision on the restrictions on the domain entities properties, for example:
- Whether a particular property is required or not. For instance, for a Product entity, the name of the product should be required property.
- Whether a value of a particular property is in given range or not. For instance, for a Product entity, the price property should be in given range.
- Whether the maximum length of a particular property should not be given value. For instance, for a Product entity, the name property value should be less than the maximum length.
There could be many such data annotations on the domain entities properties. There are two ways we can think about these data annotations:
- As part of the domain entities
- As part of the database operations logic
It is purely up to us how we see data annotations. If we consider them part of database operation then we can apply restrictions using database operation libraries API. We are going to use the Entity Framework for database operations in the Infrastructure project, so we can use Entity Framework Fluent API to annotate data.
If we consider them part of domain, then we can use
System.ComponentModel.DataAnnotationslibrary to annotate the data. To use this, right click on the Core project’s Reference folder and click on Add Reference. From the Framework tab, select
System.ComponentModel.DataAnnotations and add to the project.
We are creating a ProductApp, so let us start with creating the Product entity. To add an entity class, right click on the Core project and add a class, then name the class Product.
using System.ComponentModel.DataAnnotations;
namespace ProductApp.Core
{
    public class Product
    {
        public int Id { get; set; }
 [Required]
 [MaxLength(100)]
        public string Name { get; set; }
 [Required]
        public double Price { get; set; }
        public bool inStock { get; set; }
    }
}
We have annotated the Product entity properties with
Required and
MaxLength. Both of these annotations are part of
System.ComponentModel.DataAnnotations. Here, we have considered restriction as part of the domain, hence used data annotations in the core project itself.
We have created Product Entity class and also applied data annotation to that. Now let us go ahead and create Repository interface. But before we create that, let us understand, what is a Repository Interface?
The repository interface defines all the database operations possible on the domain entities. All database operations that can be performed on the domain entities are part of the domain information, hence we will put the repository interface in the core project. How these operations can be performed will be the part of Infrastructure project.
To create a Repository Interface, right click on the Core project and add a folder named Interfaces. Once the Interfaces folder is created, right click on the Interface folder and select add a new item, then from the Code tab select Interface. Name the Interface
IProductRepository
using System.Collections.Generic;

namespace ProductApp.Core.Interfaces
{
    public interface IProductRepository
    {
        void Add(Product p);
        void Edit(Product p);
        void Remove(int Id);
        IEnumerable GetProducts(); Product FindById(int Id); } }
Now we have created a Product entity class and a Product Repository Interface. At this point, the core project should look like this:

Let us go ahead and build the core project to verify everything is in place and move ahead to create Infrastructure project.
Infrastructure Project
Main purpose of Infrastructure project is to perform database operations. Besides database operations, it can also consume web services, perform IO operations etc. So mainly, Infrastructure project may perform the following operations:
- Database operations
- Working with WCF and Web Services
- IO operations
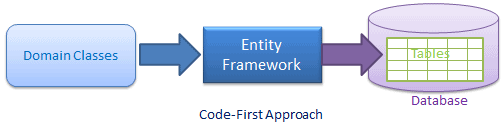
We can use any database technology to perform database operations. In this post we are going to use Entity Framework. So we are going to create database using the Code First approach. In the Code First approach, database gets created on basis of the classes. Here database will be created on the basis of the Domain entities from the Core Project.
To create the database from the Core project domain entity, we need to perform these tasks:
- Create DataContext class
- Configure the connection string
- Create DataBase Initalizer class to seed data in the database
- Implement IProductRepsitory interface
Adding References
First let’s add references of the Entity Framework and ProductApp.Core project. To add the Entity Framework, right click on the Infrastructure project and click on Manage Nuget Package. In the Package Manager Window, search for Entity Framework and install the latest stable version.
To add a reference of the ProductApp.Core project, right click on the Infrastructure project and click on Add Reference. In the Reference Window, click on the Project tab and select ProductApp.Core.
DataContext class
The objective of the DataContext class is to create the DataBase in the Entity Framework Code First approach. We pass a connection string in the constructor of DataContext class. By reading the connection string, the Entity Framework create the database. If a connection string is not specified then the Entity Framework creates the database in a local database server.
In the DataContext class:
- Create a DbSet type property. This is responsible for creating the table for the Product entity
- In the constructor of the DataContext class, pass the connection string to specify information to create database, for example server name, database name, login information etc. We need to pass name of the connection string. name where database would be created
- If connection string is not passed, Entity Framework creates with the name of data context class in the local database server.
- ProductDataContext class inherits the DbContext class
The ProductDataContext class can be created as shown in the listing below:
using ProductApp.Core;
using System.Data.Entity;

namespace ProductApp.Infrastructure
{
    public class ProductContext  : DbContext
    {
        public ProductContext()
           : base("name=ProductAppConnectionString")
       {
       }
        public DbSet Products { get; set; } } }
Next we need to work on the Connection String. As discussed earlier, we can either pass the connection string to specify database creation information or reply on the Entity Framework to create default database at default location for us. We are going to specify the connection string that is why, we passed a connection string name ProductAppConnectionString in the constructor of ProductDataContext class. In the App.Config file the ProductAppConnectionString connection string can be created as shown in the listing below:
<add name="ProductAppConnectionString" connectionString="Data Source=(LocalDb)\v11.0;Initial Catalog=ProductAppJan;Integrated Security=True;MultipleActiveResultSets=true" providerName="System.Data.SqlClient"/>
Database Initializer class
We create a database initializer class to seed the database with some initial value at time of the creation. To create the Database initializer class, create a class which inherits from
DropCreateDatabaseIfModelChnages. There are other options of classes available to inherit in order to create a database initializer class. If we inherit DropCreateDatabaseIfModelChnages class then each time a new database will be created on the model changes. So for example, if we add or remove properties from the Product entity class, Entity Framework will drop the existing database and create a new one. Of course this is not a great option, since data will be lost too, so I recommend you explore other options to inherit the database initializer class.
The database initializer class can be created as shown in the listing below. Here we are seeding the product table with two rows. To seed the data:
- Override Seed method
- Add product to Context.Products
- Call Context.SaveChanges()
using ProductApp.Core;
using System.Data.Entity;

namespace ProductApp.Infrastructure
{
    public class ProductInitalizeDB : DropCreateDatabaseIfModelChanges { protected override void Seed(ProductContext context) { context.Products.Add(new Product { Id = 1, Name = "Rice", inStock = true, Price = 30 }); context.Products.Add(new Product { Id = 2, Name = "Sugar", inStock = false, Price = 40 }); context.SaveChanges(); base.Seed(context); } } }
So far, we have done all the Entity Framework Code First related work to create the database. Now let’s go ahead and implement IProductRepository interface from the Core project in a concrete ProductRepository class.
Repository Class
This is the class which will perform database operations on the Product Entity. In this class, we will implement the IProductRepository interface from the Core project. Let us start with adding a class ProductRepository to the Infrastructure project and implement IProductRepository interface. To perform database operations, we are going to write simple LINQ to Entity queries. ProductRepositry class can be created as shown in the listing below:
using ProductApp.Core.Interfaces;
using System.Collections.Generic;
using System.Linq;
using ProductApp.Core;

namespace ProductApp.Infrastructure
{
    public class ProductRepository : IProductRepository
    {
        ProductContext context = new ProductContext();
        public void Add(Product p)
        {
            context.Products.Add(p);
            context.SaveChanges();
        }

        public void Edit(Product p)
        {
            context.Entry(p).State = System.Data.Entity.EntityState.Modified;
        }

        public Product FindById(int Id)
        {
            var result = (from r in context.Products where r.Id == Id select r).FirstOrDefault();
            return result;
        }

        public IEnumerable GetProducts() { return context.Products; } public void Remove(int Id) { Product p = context.Products.Find(Id); context.Products.Remove(p); context.SaveChanges(); } } }
So far we have created a Data Context class, a Database Initializer class, and the Repository class. Let us build the infrastructure project to make sure that everything is in place. The ProductApp.Infrastructure project will look as given in the below image:

Now we’re done creating the Infrastructure project. We have written all the database operations-related classes inside the Infrastructure project, and all the database-related logic is in a central place. Whenever any changes in database logic is required, we need to change only the infrastructure project.
Test Project
The biggest advantage of Repository Pattern is the testability. This allows us to unit test the various components without having dependencies on other components of the project. For example, we have created the Repository class which performs the database operations to verify correctness of the functionality, so we should unit test it. We should also be able to write tests for the Repository class without any dependency on the web project or UI. Since we are following the Repository Pattern, we can write Unit Tests for the Infrastructure project without any dependency on the MVC project (UI).
To write Unit Tests for ProductRepository class, let us add following references in the Test project.
- Reference of ProductApp.Core project
- Reference of ProductApp.Infrastructure project
- Entity Framework package
To add the Entity Framework, right click on the Test project and click on Manage Nuget Package. In the Package Manger Windows, search for Entity Framework and install the latest stable version.
To add a reference of the ProductApp.Core project, right click on the Test project and click on Add Reference. In the Reference Window, click on Project tab and select ProductApp.Core.
To add a reference of the ProductApp.Infrastructure project, right click on the Test project and click on Add Reference. In the Reference Window, click on Project tab and select ProductApp.Infrastructure.
Copy the Connection String
Visual Studio always reads the config file of the running project. To test the Infrastructure project, we will run the Test project. Hence the connection string should be part of the App.Config of the Test project. Let us copy and paste the connection string from Infrastructure project in the Test project.
We have added all the required references and copied the connection string. Let’s go ahead now and set up the Test Class. We’ll create a Test Class with the name ProductRepositoryTest.
Test Initialize is the function executed before the tests are executed. We need to create instance of the ProductRepository class and call the ProductDbInitalize class to seed the data before we run tests. Test Initializer can be written as shown in the listing below:
[TestClass]
    public class ProductRepositoryTest
    {
        ProductRepository Repo;
 [TestInitialize]
        public void TestSetup()
        {
            ProductInitalizeDB db = new ProductInitalizeDB();
            System.Data.Entity.Database.SetInitializer(db);
            Repo = new ProductRepository();
        }
    }
Now we’ve written the Test Initializer. Now let write the very first test to verify whether ProductInitalizeDB class seeds two rows in the Product table or not. Since it is the first test we will execute, it will also verify whether the database gets created or not. So essentially we are writing a test:
- To verify database creation
- To verify number of rows inserted by the seed method of Product Database Initializer
[TestMethod]
        public void IsRepositoryInitalizeWithValidNumberOfData()
        {
            var result = Repo.GetProducts();
            Assert.IsNotNull(result);
            var numberOfRecords = result.ToList().Count;
            Assert.AreEqual(2, numberOfRecords);
        }
As you can see, we’re calling the Repository GetProducts() function to fetch all the Products inserted while creating the database. This test is actually verifying whether GetProducts() works as expected or not, and also verifying database creation. In the Test Explorer window, we can run the test for verification.

To run the test, first build the Test project, then from the top menu select Test->Windows-Test Explorer. In the Test Explorer, we will find all the tests listed. Select the test and click on Run.
Let’s go ahead and write one more test to verify Add Product operation on the Repository:
 [TestMethod]
        public void IsRepositoryAddsProduct()
        {
            Product productToInsert = new Product
            {
                Id = 3,
                inStock = true,
                Name = "Salt",
                Price = 17

            };
            Repo.Add(productToInsert);
            // If Product inserts successfully,
            //number of records will increase to 3
            var result = Repo.GetProducts();
            var numberOfRecords = result.ToList().Count;
            Assert.AreEqual(3, numberOfRecords);
        }
To verify insertion of the Product, we are calling the Add function on the Repository. If Product gets added successfully, the number of records will increase to 3 from 2 and we are verifying that. On running the test, we will find that the test has been passed.

In this way, we can write tests for all the Database operations from the Product Repository class. Now we are sure that we have implemented the Repository class correctly because tests are passing, which means the Infrastructure and Core project can be used with any UI (in this case MVC) project.
MVC or Web Project
Finally we have gotten to the MVC project! Like the Test project, we need to add following references
- Reference of ProductApp.Core project
- Reference of ProductApp.Infrastructure project
To add a reference of the ProductApp.Core project, right click on the MVC project and click on Add Reference. In the Reference Window, click on Project tab and select ProductApp.Core.
To add a reference of the ProductApp.Infrastructure project, right click on the MVC project and click on Add Reference. In the Reference Window, click on Project tab and select ProductApp.Infrastructure.
Copy the Connection String
Visual Studio always reads the config file of the running project. To test the Infrastructure project, we will run the Test project, so the connection string should be part of the App.Config of the Test project. To make it easier, let’s copy and paste the connection string from Infrastructure project in the Test project.
Scaffolding the Application
We should have everything in place to scaffold the MVC controller. To scaffold, right click on the Controller folder and select MVC 5 Controller with Views, using Entity Framework as shown in the image below:

Next we will see the Add Controller window. Here we need to provide the Model Class and Data context class information. In our project, model class is the Product class from the Core project and the Data context class is the ProductDataContext class from the Infrastructure project. Let us select both the classes from the dropdown as shown in the image below:

Also we should make sure that the Generate Views, Reference script libraries, and Use a layout page options are selected.
On clicking Add, Visual Studio will create the ProductsController and Views inside Views/Products folder. The MVC project should have structure as shown in the image below:

At this point if we go ahead and run the application, we will be able to perform CRUD operations on the Product entity.
 Problem with Scaffolding
But we are not done yet! Let’s open the ProductsController class and examine the code. On the very first line, we will find the problem. Since we have used MVC scaffolding, MVC is creating an object of the ProductContext class to perform the database operations.

Any dependencies on the context class binds the UI project and the Database tightly to each other. As we know the Datacontext class is an Entity Framework component. We do not want the MVC project to know which database technology is being used in the Infrastructure project. On the other hand, we haven’t tested the Datacontext class; we’ve tested the ProductRepository class. Ideally we should use ProductRepository class instead of the ProductContext class to perform database operations in the MVC Controller. To summarize,
- MVC Scaffolding uses Data context class to perform database operations. The data context class is an Entity Framework component, so its uses tightly couples UI (MVC) with the Database (EF) technology.
- The data context class is not unit tested so it’s not a good idea to use that.
- We have a tested ProductRepository class. We should use this inside Controller to perform database operations. Also, the ProductRepository class does not expose database technology to the UI.
To use the ProductRepository class for database operations, we need to refactor the ProductsController class. To do so, there are two steps we need to follow:
- Create an object of ProductRepository class instead of ProductContext class.
- Call methods of ProductRepository class to perform database operations on Product entity instead of methods of ProductContext class.
In the listing below, I have commented codes using ProductContext and called ProductRepository methods. After refactoring, the ProductController class will look like the following:
using System;
using System.Net;
using System.Web.Mvc;
using ProductApp.Core;
using ProductApp.Infrastructure;

namespace ProductApp.Web.Controllers
{
    public class ProductsController : Controller
    {
        //private ProductContext db = new ProductContext();
        private ProductRepository db = new ProductRepository();


        public ActionResult Index()
        {
            //return View(db.Products.ToList());
            return View(db.GetProducts());
        }


        public ActionResult Details(int? id)
        {
            if (id == null)
            {
                return new HttpStatusCodeResult(HttpStatusCode.BadRequest);
            }
            // Product product = db.Products.Find(id);
            Product product = db.FindById(Convert.ToInt32(id));
            if (product == null)
            {
                return HttpNotFound();
            }
            return View(product);
        }


        public ActionResult Create()
        {
            return View();
        }

 [HttpPost]
 [ValidateAntiForgeryToken]
        public ActionResult Create([Bind(Include = "Id,Name,Price,inStock")] Product product)
        {
            if (ModelState.IsValid)
            {
                // db.Products.Add(product);
                //db.SaveChanges();
                db.Add(product);
                return RedirectToAction("Index");
            }

            return View(product);
        }


        public ActionResult Edit(int? id)
        {
            if (id == null)
            {
                return new HttpStatusCodeResult(HttpStatusCode.BadRequest);
            }
            Product product = db.FindById(Convert.ToInt32(id));
            if (product == null)
            {
                return HttpNotFound();
            }
            return View(product);
        }

 [HttpPost]
 [ValidateAntiForgeryToken]
        public ActionResult Edit([Bind(Include = "Id,Name,Price,inStock")] Product product)
        {
            if (ModelState.IsValid)
            {
                //db.Entry(product).State = EntityState.Modified;
                //db.SaveChanges();
                db.Edit(product);
                return RedirectToAction("Index");
            }
            return View(product);
        }


        public ActionResult Delete(int? id)
        {
            if (id == null)
            {
                return new HttpStatusCodeResult(HttpStatusCode.BadRequest);
            }
            Product product = db.FindById(Convert.ToInt32(id));
            if (product == null)
            {
                return HttpNotFound();
            }
            return View(product);
        }


 [HttpPost, ActionName("Delete")]
 [ValidateAntiForgeryToken]
        public ActionResult DeleteConfirmed(int id)
        {
            //Product product = db.FindById(Convert.ToInt32(id));
            // db.Products.Remove(product);
            // db.SaveChanges();
            db.Remove(id);
            return RedirectToAction("Index");
        }

        protected override void Dispose(bool disposing)
        {
            if (disposing)
            {
                //db.Dispose();
            }
            base.Dispose(disposing);
        }
    }
}
After refactoring, let’s go ahead and build and run the application – we should be able to do so and perform the CRUD operations.
Injecting the Dependency
Now we’re happy that the application is up and running, and it was created using the Repository pattern. But still there is a problem: we are directly creating an object of the ProductRepository class inside the ProductsController class, and we don’t want this. We want to invert the dependency and delegate the task of injecting the dependency to a third party, popularly known as a DI container. Essentially, ProductsController will ask the DI container to return the instance of IProductRepository.
There are many DI containers available for MVC applications. In this example we’ll use the simplest Unity DI container. To do so, right click on the MVC project and click Manage Nuget Package. In the Nuget Package Manager search for Unity.Mvc and install the package.

Once the Unity.Mvc package is installed, let us go ahead and open App_Start folder. Inside the App_Start folder, we will find the UnityConfig.cs file. In the UnityConfig class, we havr to register the type. To do so, open RegisterTypes function in UnityConfig class and register the type as shown in the listing below:
public static void RegisterTypes(IUnityContainer container)
        {


            // TODO: Register your types here
            container.RegisterType(); }
We have registered the type to Unity DI container. Now let us go ahead and do a little bit of refactoring in the ProductsController class. In the constructor of ProductsController we will pass the reference of the repository interface. Whenever required by the application, the Unity DI container will inject the concrete object of ProductRepository in the application by resolving the type. We need to refactor the ProductsController as shown in the listing below:
  public class ProductsController : Controller
    {
        IProductRepository db;
        public ProductsController(IProductRepository db)
        {

            this.db = db;
        }
Let us go ahead and build and run the application. We should have the application up and running, and we should able to perform CRUD operations using Repository Pattern and Dependency Injection!
Conclusion
In this article, we learned in a step by step manner how to create an MVC application following the Repository pattern. In doing so, we can put all the database logic in one place and whenever required, we only need to change the repository and test that. The Repository Pattern also loosely couples the application UI with the Database logic and the Domain entities and makes your application more testable.
I hope you found this post useful, thanks for reading!